Friday, September 30, 2011

Swoon Block #1

So I cut each piece of my new fabric in half - 9 half yard cuts of each so divided in half I ended up with 18 fat quarters which is what the pattern calls for. I decided that rather than using 18 different fat quarters, that I would use 9 different fabrics and would use each one twice in the quilt, once as the feature fabric and once as the accent. I layed 9 pieces out on the floor, then layed the other 9 over them, making sure to not have the same two fabrics in any pairing, tried not to switch them around or obsess about it too much and got to work. All was going well, until I made a huge cutting booboo. :( I didn't have enough fabric to start fresh so I had to use what I had ~ does anyone spot it??


Like I'm going to point it out!! I'm hoping that once it's done and quilted, it won't be as noticeable to me as it is right now. But, at any rate, the block came together really well, (I will be much more careful with my cutting in the future. . . . I will be much more careful with cutting in the future. . . . .) and I am really happy with this, my first Swoon block. Only 8 more to go! Oh, and by the the way, these blocks are HUGE! Seriously. 24 inches square! That might not seem so big in your mind, but really it is a thing to behold. I have a feeling that there is going to be nothing subtle about this quilt!

I've linked this up with Lynn at Lily's Quilts for her Fresh Sewing Day and Small Blog Meet.
Small Blog Meet

Linked up with Manic Monday Link Party:

Sew Happy Geek


Linked up with {Sew} Modern Monday.

Thursday, September 29, 2011

Much anticipated arrival....

It's here! And it's beautiful. Hometown by Sweetwater for Moda Fabrics. I purchased this from Sarah at 'Swell Cloth' on Etsy, and I would highly recommend her shop. Wonderful service, so helpful and willing to answer any and all questions. Thanks Sarah!

Swoon Flickr Favorites


So while I continue to wait for my Swoon fabric, how about some of my favorites of other people's versions from Flickr! I think they all turn out beautifully, I haven't seen one yet that I don't like.

Tuesday, September 27, 2011

Waiting for fabric.....so, in the meantime?

I am waiting for fabric so I can start the Swoon quilt that I have planned for Graham's and my bed. I have my neutral fabric bought, all cut and ready to go, and hope that my print fabrics arrive this week. I have no other major (or minor!) projects in the works, so what to do in the meantime? Make coasters!!


Do I need coasters? Probably not. Do I have fabric scraps? YES!!! I had bookmarked this tutorial by Jeni from In Color Order, for simple log cabin style coasters. I started them last evening and finished them this afternoon. So simple, but they turned out really cute. And even though we don't need them, I hope that we end up using them.

So tell me, what do you do during those in between times, when you don't have anything major in the works??

Monday, September 26, 2011

Sick Day Crafts - Glass Marble {Magnets}

Levi is home sick today. Not too sick, just lethargic with a very slight fever and a stuffy nose. It was enough to keep him home from school today, but then.....what to do all day? We watched some retro Looney Tunes cartoons and The Price Is Right, then baked chocolate chip oatmeal cookies, and while he did a puzzle I got out the supplies to make some glass marble magnets. I have some that I received as a gift from my sister, purchased from Tanner Glass on Etsy, but then I saw a tutorial online and it was so easy! I already had the 'marbles', scraps of paper, and Mod Podge, so thus far a very cheap project.


Levi became interested and we figured he should make some too! So he got out a Lego Club magazine, cut out some teeeny pictures (that's the hard part, finding images small enough that would still be recognizable when cut to size), and he is so pleased with them!


It was a fun thing for us to do together on this tired/sick/rainy/windy/blustery day. :)

I called these {magnets} in the title because they are meant to have small magnets glued to the backs so you can use them on the fridge. I have no magnets yet!

Saturday, September 24, 2011

Summer Sampler FINISHED!

The Summer Sampler Quilt is finished, and I'm so pleased with it. I quilted the blocks each on their own, not an overall quilting design. Some have more quilting, others have less, and it seems to work. This finished at about 42"x42". Mostly just wanted to share the pictures.....


Friday, September 23, 2011

Summer Sampler Binding

Summer Sampler Binding by HeatherDD
Summer Sampler Binding, a photo by HeatherDD on Flickr.

I was feeling like this needed dots - specifically red dots. When I was a teenager I had a VERY red bedroom and maybe that is starting to come back to me. Well, I'm off to do some hand-stitching......

Thursday, September 22, 2011

Summer Sampler Series blocks


I had been seeing the Summer Sampler Series quilts popping up all over blogs this summer. It appealed to me, but I wasn't ready to jump in at that moment, I think probably because I was trying (and struggling with!) to get Owen's quilt finished. Now that it is finished, and I have plans for a quilt for Graham and myself that involves quite a lot of points, and thus precision, I thought that I would try a few of the Summer Sampler Series blocks to get some practice with half square triangles and more complicated blocks that need to line up! I ended up really liking the variety and quickly made 9 blocks, 7 of them from the series and 2 that I came up with on my own. I wasn't sure what to do with them, but I stitched them together with some dark gray sashing strips, and decided that it would look awesome on my kitchen wall! I am now about 2/3 of the way through quilting it and will show more photos soon.

Wednesday, September 21, 2011

My boys' quilts, and moving forward...

Alright, so I'm feeling a tad bogged down with the thought of "back-blogging" all of my little projects, so I think what I'll do is show my two major finished projects from the past months, and then move forward with fresh stuff - what I'm currently working on, and what's in the works.

I have completed twin sized bed quilts for each of my two boys in the last half year or so. For my oldest son Levi, I made Denyse Schmidt's Drunk Love 2-Tone Quilt (maybe not an appropriate quilt name for a 9 year old, but hey, I just followed the pattern!).


He chose the colours, which oddly enough are pretty much the same as what's shown on her website, though I followed the pattern in her Quilt's book where the quilt is shown in orange. My blocks for this quilt came out slightly small (still working on that 1/4" seam....) so I added a border at the top, which I was frustrated about at the time (it wasn't in the PLAN!), but actually ended up really liking. He chose yellow for the backing, which surprised me but it "goes" and I love it! This was my first time machine quilting a bed sized quilt, and that part proved to be super challenging, especially since I chose sharply contrasting colours in my bobbin and top threads and was having a fair amount of the wrong colours showing on top or bottom, but I like the plain straight line stitching and really, who besides me looks at it that closely?! :) Levi loves it, and that's all that counts, right?

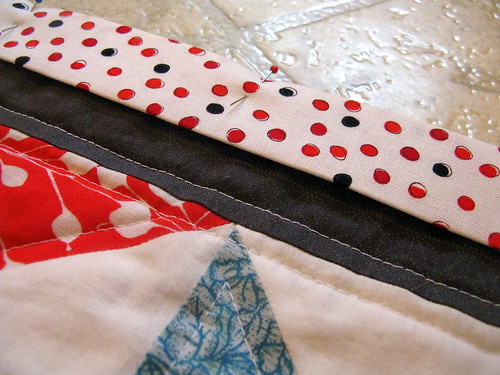
For my son Owen, it was tougher to choose! I was looking at so many patterns, ones that I thought he would like, and none of them suited his taste! Well then I found Malka Dubrawsky's Shoo Fly Quilt, and that was the one! The "O" quilt, for Owen. He was pretty pleased with that whole idea. :)


He told me the colours he wanted, I chose the fabric, and went to work. I made all of the blocks pretty quick, but then I stalled out when it came time to put them into rows. I was struggling with having my points match up precisely (I'm a bit of a perfectionist that way!) and it was making me not want to work on it at all. I honestly left it for a couple of months before coming back to it and realizing that if I waited for it to be perfect, a) I'd never feel like working on it, and b) it would never end up finished, I just pieced them together as carefully as I could, and now that the quilting is done and it's on his bed, I wonder why I ever worried so much about it. It turned out great.


I used a double size bed sheet for the backing, which ended up not quite big enough so I pieced a strip of the left over fabrics to add to the backing and I'm glad that I did, it adds something fun to the back of the quilt as well!

Tuesday, September 20, 2011

TV Cabinet Topper


Another back-logged (ie. unblogged, and I'm warning you I have a fair number back-logged that I aim to catch up on!) project. I made this one quite a few months ago, and it was probably my first good sized quilted project. I followed this pattern from The Purl Bee, pretty much, altering the layout of the squares and the dimensions of the finished project. I made it to fit the top of the new-to-us-from-Craigslist IKEA cabinet, with a few inches spared on each side. The fabric used was a random fat quarter pack from Wal-Mart's fabric department, the neutral is just plain old muslin, and I quilted it with pairs of diagonal lines going in both directions. I was nervous about the red binding, but I really like it - red is growing on me these days and a I gravitate toward is fairly often.

Ironing Board Cover Re-do

My ironing board was seriously icky. For one thing, the padding beneath the cover was totally flat and even sort of disintegrating in places, so bad that sometimes when pressing I would end up with the imprint of the metal frame of the board on my fabric! Not desireable at all. Not to mention the discoloration of the cover. So I searched my favorite blogs and pretty much followed this tutorial from Comfort Stitching to make a new one. I ended up having to piece together fabric to make my piece long enough - I thought what I had, the floral print, was enough but apparently ironing boards are longer than you think - but I love the result with the tiny polka dotted stripes.

I purchased a huge wool blanket from the thrift store for a couple of dollars and cut it up into three pieces, trimmed them to the size of my board and layered them beneath the cover. I'm thinking that will last a whole lot longer than the flimsy foam that it came with.


And to go along with that, my new iron! A 'Black & Decker All Temp Steam Iron'. My old one was very finicky - it had been a wedding gift, and served its purpose, because let's be honest, I very rarely ironed anything at all, so it got the job done - but the steam was unpredictable and couldn't be turned on/off, the steam was just always on unless the tank was empty. For sewing I wanted something a bit better. I got this iron for half price, and it is awesome. It is really heavy, which is good for pressing, and it has steam on/off for all the different temperature settings. Funny thing to get all excited about, it is just an iron after all, but I feel quite spoiled!

Monday, September 19, 2011

Fresh Start

Here I am, blogging again! My old blog is gone, deleted from cyberspace. I felt like I put too much personal stuff out there and got away from my original intent a bit. I want a place where I can plop pictures and descriptions of the projects I'm working on and what I finish. At this point, it's all about sewing and quilting.....used to be about knitting.....hence the generic blog title that could be open to any future crafting endeavors. :)

I tend to just decide that I'm going to try something new. I don't take classes, I don't really learn from someone else (unless you count all the wonderful online bloggers and tutorials that I have learned SO MUCH from), I just jump in and go with it. Last fall I borrowed a sewing machine from my friend Karen for a few months, then I had my mother-in-law's machine for a while, then my mom's machine, before finally getting my own. I have a Janome Sewist 521. It is very basic, but it works. I do seem to need to fiddle with the tension quite a bit, still haven't found the 'perfect' balance, but for quilting it is awesome.